How to set up one-sided or two-sided printing in Microsoft Office
When printing a document or file from Microsoft Office 365, the default print settings are often set to print double-sided (or two-sided). Below are the instructions on how to change the print settings to one-sided printing, as well as how to save a preset for future printing.
Change print settings to one-sided printing:
- In Word, navigate to File > Print.
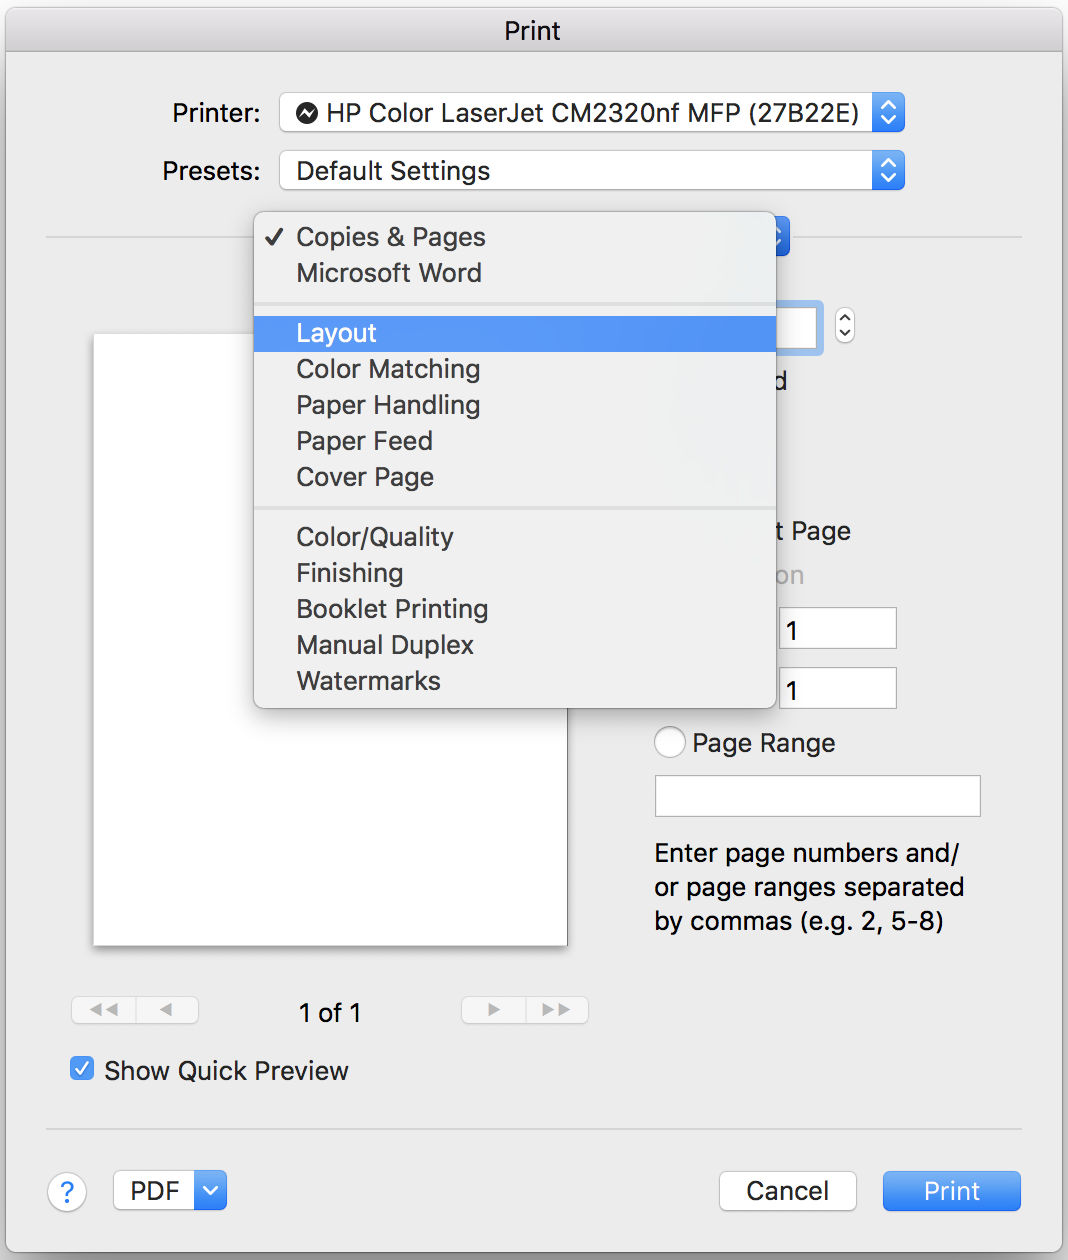
In the Print dialogue box, click on the third drop-down menu (where it says Copies & Pages), and click Layout.
Under Layout, click the Two-Sided drop-down menu, and select "Off".


Save preset for one-sided printing:
Once you've changed the Two-Sided print setting to Off under Layout, under the Presets drop-down menu, click "Save Current Settings as Preset..."
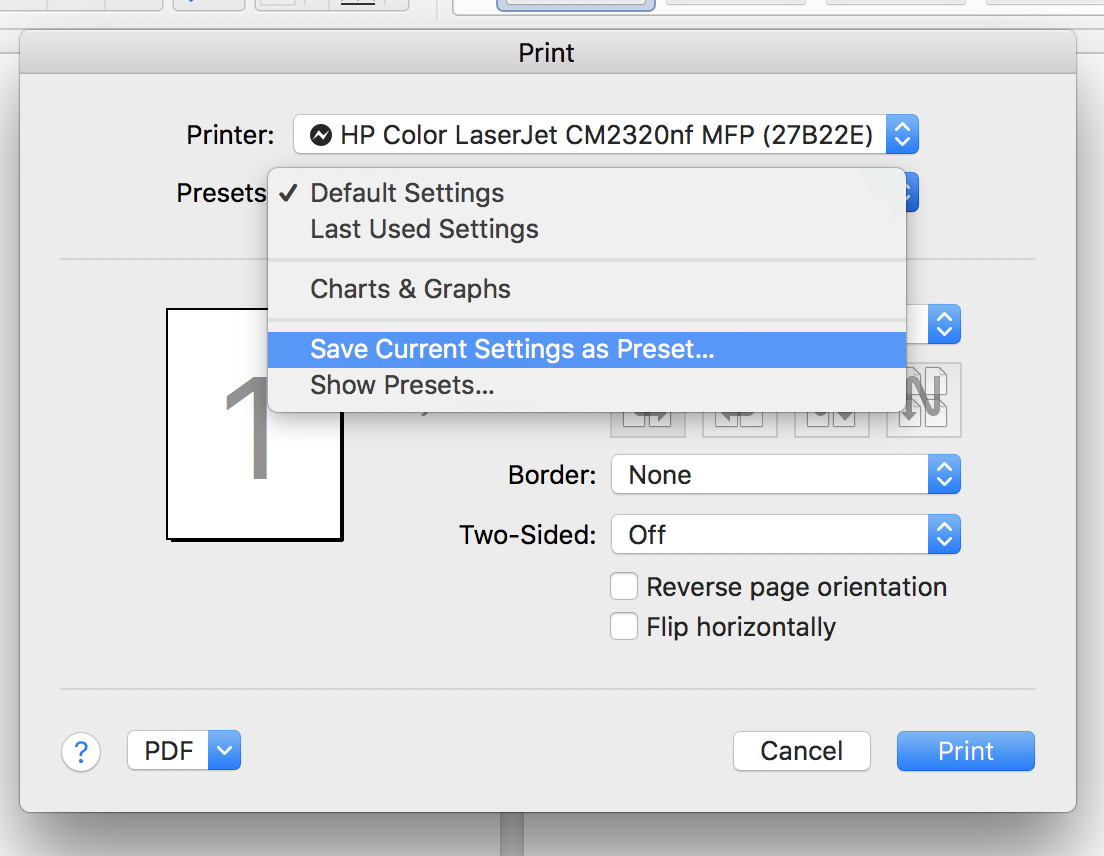
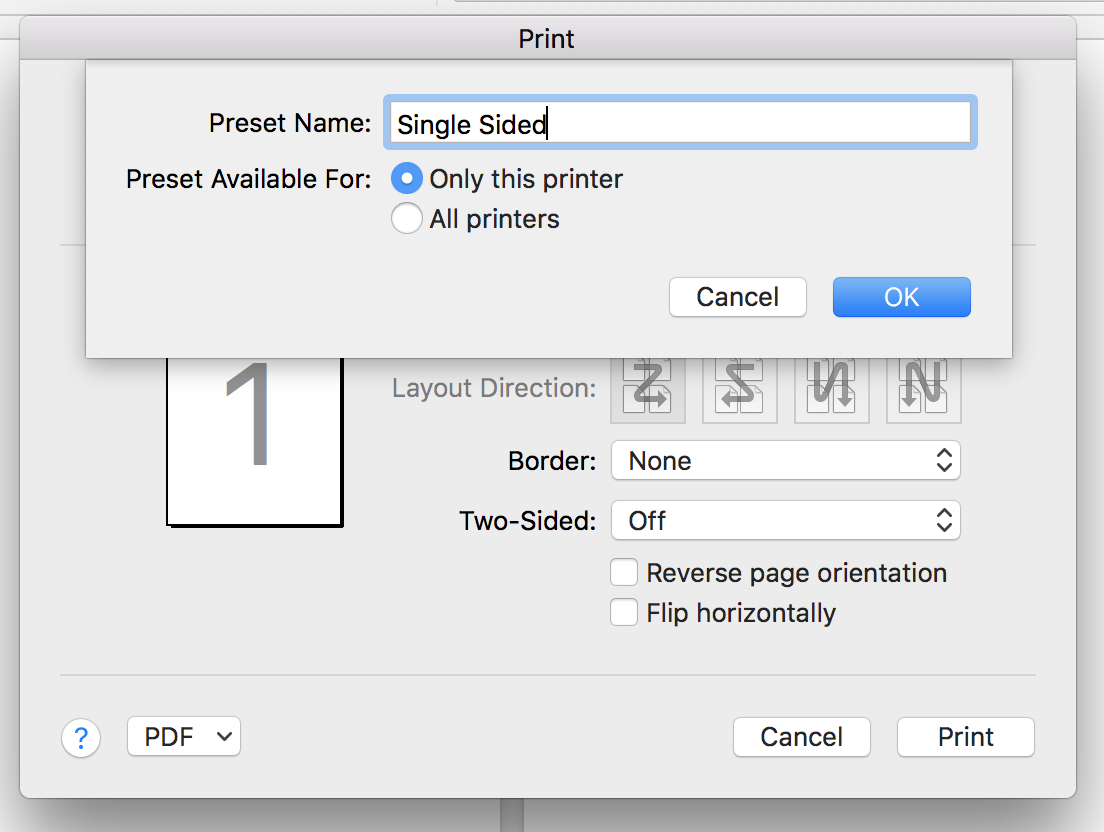
Give the preset a name (ie. One-Sided, or Single Sided) and click Ok.


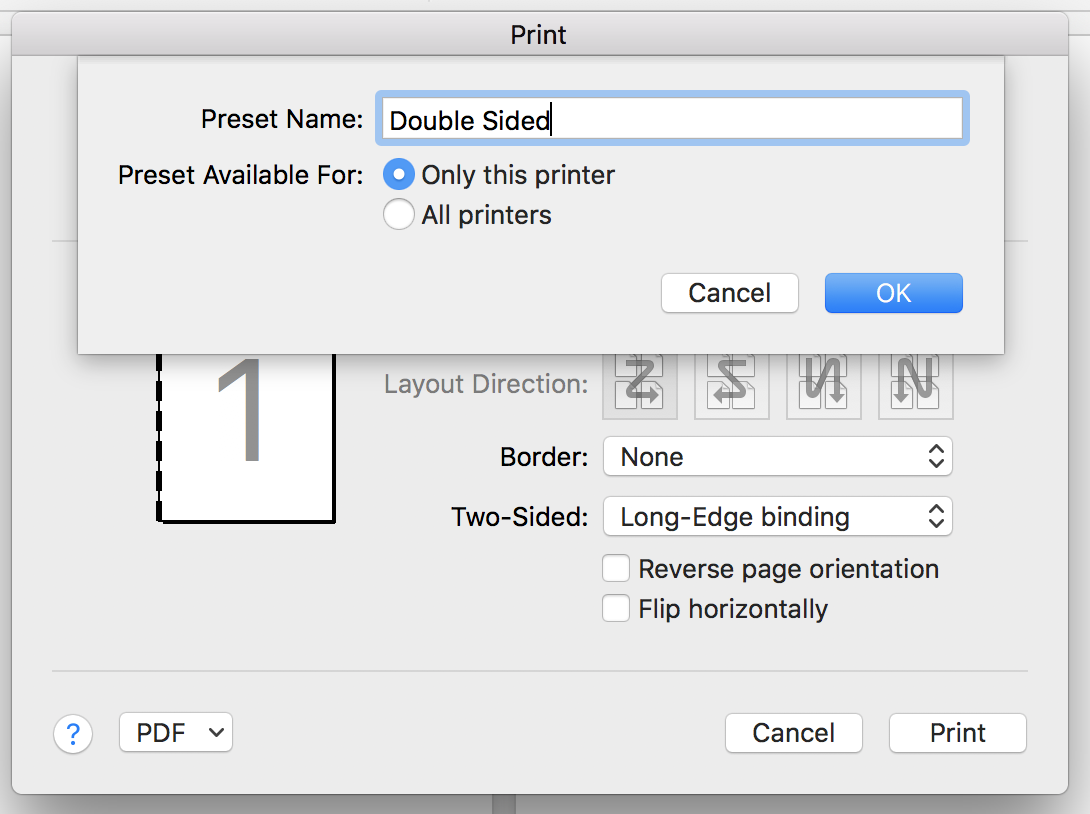
Save preset for double-sided printing:
- Repeat the first steps. In the Print dialogue window, under Two-Sided, select "Long-Edge" binding, (or Short-Edge, depending on how you typically print).
- Under the Presets drop-down menu, click "Save Current Settings as Preset..."
Give the preset a name, (ie. Double Sided), and click Ok.
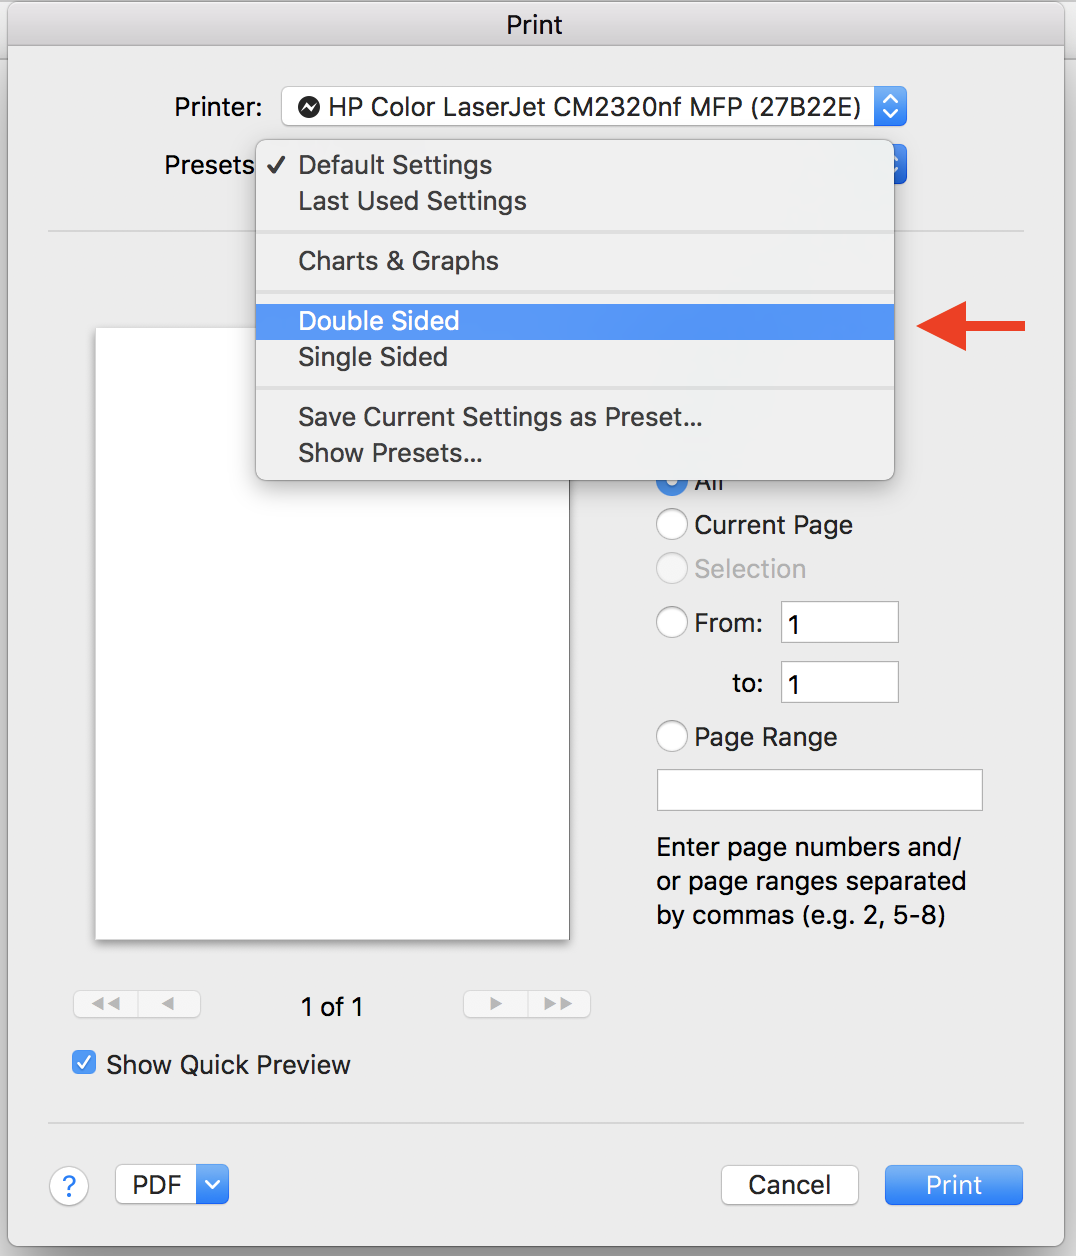
Finally, when you're ready to print, you can choose which preset you prefer under the Presets menu in the Print dialogue box: