How to add your signature to a PDF on a Mac
Whether Classmate has just sent you a new least to sign off on, your child's teacher needs your autograph on a permission slip, or you're dealing with one of a thousand other possible requests, signing and returning digital documents can be a time consuming (and wasteful) process.
What if we told you that the dark days of printing a document, searching for a (working) pen, signing , scanning, recycling, and emailing it back could be a thing of the past, and that you can sign and return most documents without even leaving your seat?
All you'll need is your Mac, a PDF that you'd like to sign, and a powerful (and simple) built-in application called Preview.
Creating and saving your signature:
Before you can add your signature to your first document, you'll first need to let Preview know what your signature looks like! You'll only need to do this once, and can then insert your signature with just a couple of clicks from that point on.
- Open Preview from Finder > Applications (or by opening the PDF that you're needing to sign).
- In the menu bar at the top of the screen, head to Tools > Annotate > Signature > Manage Signatures > Create Signature
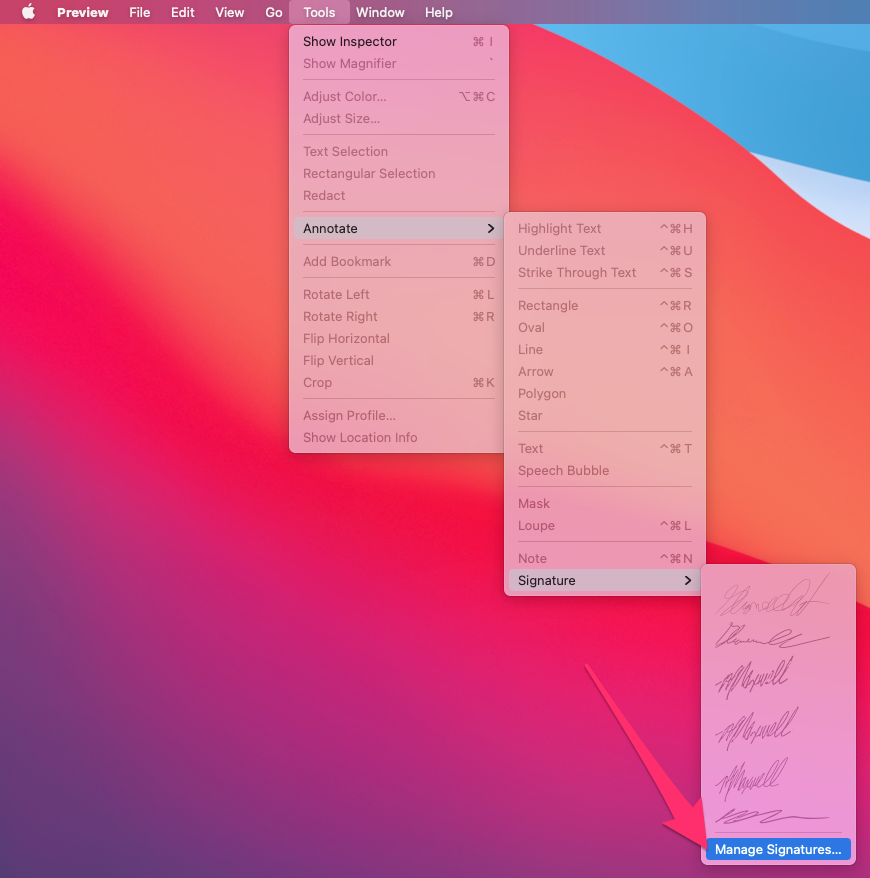
- You'll have a couple of different options to capture your signature. As it'll likely look the best (and since you'll only need to set it up once), we'd suggest grabbing a piece of paper and a pen and using the 'Camera' option.
Here's what you'll need to do:
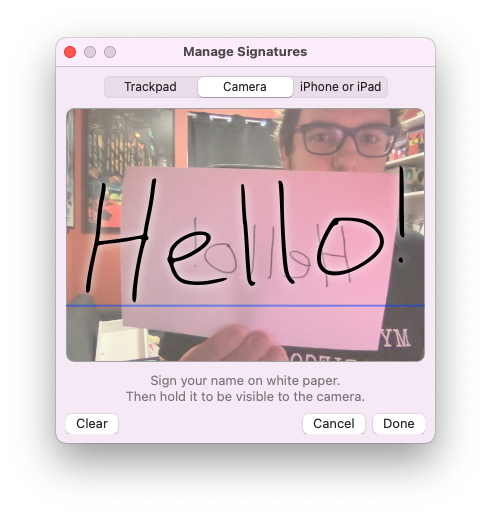
- Sign your signature on the piece of paper. We'd suggest making the signature pretty large, as it'll be easier to capture in the next step and once captured you can shrink or enlarge it as needed.
- Hold your signed paper in front of the camera. Try your best to place your signature on the blue line. Once preview captures your signature, you can click Clear to try again, or Done if it looks good!
Alternatively, you can also use your trackpad to draw a signature. Apple details the different options right here (just note that you won't be able to use the iPhone / iPad method if you're signed into a school Apple ID).
- Sign your signature on the piece of paper. We'd suggest making the signature pretty large, as it'll be easier to capture in the next step and once captured you can shrink or enlarge it as needed.
- That's it! Your signature is now saved in Preview, and is ready to be placed on any PDF document.


Quick Tip:
Preview gives the ability to save multiple signatures, so if you sometimes sign in a different way, or with just your initials, you can add them here too!
Placing your signature on a document:
Once you've captured your signature, you can add it to a PDF with just a couple of clicks.
- Open your PDF document in Preview. This is the default application for PDFs on your Mac, but if you use Adobe Reader or another app as your default instead, you can right-click on the PDF file and choose Open With > Preview.
- Click the Show Markup Toolbar button
 (if the Markup toolbar isn’t showing), then click the Sign button
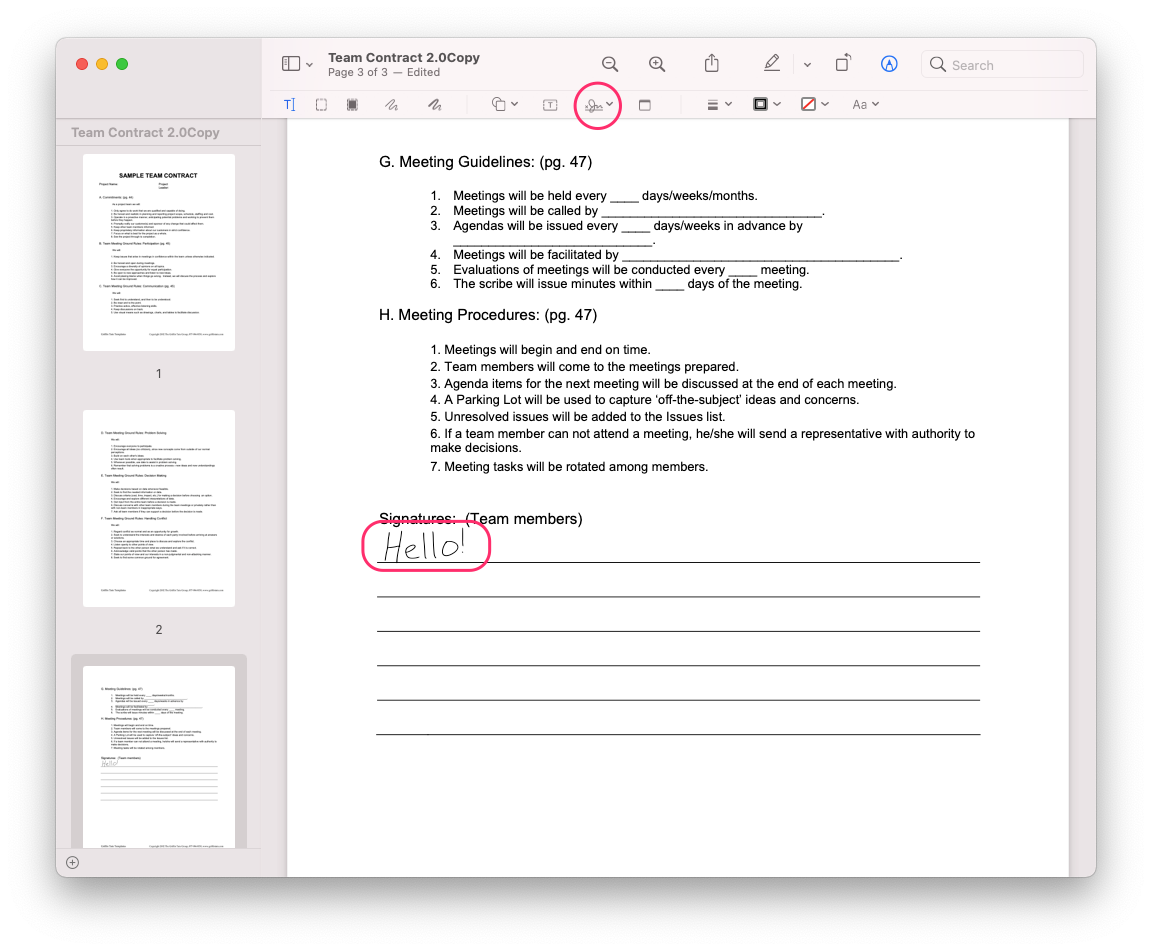
  . You can also add the signature by heading to Tools > Annotate > Signature.
 - Click the appropriate signature to add it to your PDF. You can then drag it to the desired location, and grab the corners to adjust its size.
- Preview automatically saves your changes when you close the document. You should now be able to email the PDF back to its requester.

For additional help, check out the Apple Support Article here.