How do I upload my files to Google Drive?
Knowing that your files are safely backed up online and accessible from anywhere is an amazing feeling, and that's why we love storing everything in Google Drive.
Google offers a number of different ways to move your files and folders into Google Drive — read on for some of our favourites.
From your current school-issued Mac:
If you're already using a managed Mac, then your device should already have the Google Drive app available. This is by far the easiest way to move your content to Google Drive.
With the Google Drive app, your 'My Drive' and even your Shared Drives look and act as though they're folders locally stored on your device. You can drag files right into Google Drive just like you would to your Desktop or another folder, and even save content right to Google Drive from apps like Microsoft Word.
Since it's so easy to use Google Drive on your managed Mac, we recommend sorting and saving all of your content right to Google Drive. This will make migrating to a new device far more seamless, and you'll be able to easily access your content on all of your devices. It also means that if a rogue cup of coffee (or something else unthinkable) and your MacBook were to meet, your data will be safe!
Baxter didn't save his important work to Google Drive, and it ended in disaster. You can take a look at our World Backup Day 2023 video below to learn more.
If you're not already saving your content to Google Drive and have a bunch of items to move, we'd recommend opening two Finder windows, and dragging things across as needed. Here's how:
- On your Mac, click on the Finder icon to open a new Finder window (this is the blue smiley icon on your dock).
- Once the window is open, you can hit COMMAND+N, or head to File > New Finder Window to open another.
- Set your two Finder windows up side-by-side to make it easier to drag content across.
- In the right FInder window (this could be either window, but we chose the right one), look in the sidebar for Google Drive under Locations. Then choose My Drive.
If you don't see this option, Google Drive may not be open, so head to your Applications folder and open the app (and sign into your school Google account if asked).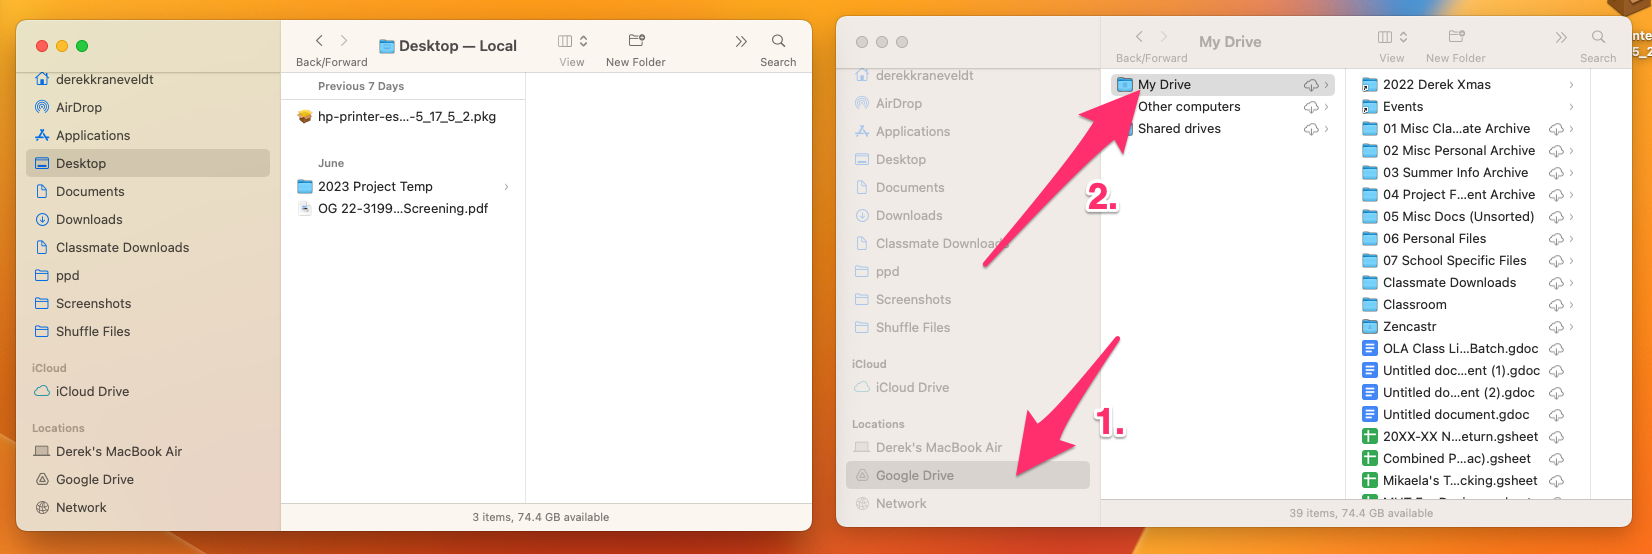
- Now you can simply navigate to the content you'd like to move over in the left Finder window, and then drag it to your 'My Drive' on the right. Feel free to use this as an opportunity to create folders in Google Drive and organize the files to your heart's content!
Content that you move here will automatically upload to Google Drive, but if the files are very large or there are a lot of them, it may take some time for them to appear.

Mac or PC: Moving files/folders into Google Drive from your web browser:
- Open your web browser and navigate to Google Drive.
In the top left corner, click New
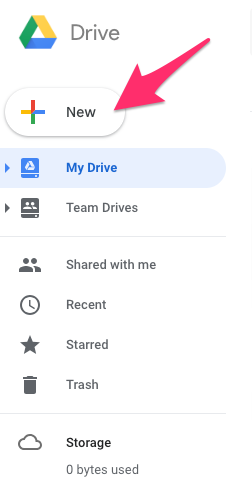
- Select File upload or Folder upload
- Find the corresponding file or folder on your computer
Classmate Tip: When selecting files from your computer hold the Control or Command-key while you click to select multiple files at a time. Hold the Shift-key while you click to select a range of files.
- Click Open
- You're done! You'll see a progress bar in the lower-right of your screen as your file/folder uploads.

Note: This method only allows you to select one folder at a time. You can go through the steps multiple times to add additional folders to the upload queue.
If you have a lot of files and folders to upload, you can also simply drag them into the Google Drive browser window to add them to the upload queue.
Chromebook: Moving files/folders into Google Drive from the 'Files' app:
This would require your files to be on a USB stick or other external media. For the step-by-step below, we'll assume you're using a USB stick.
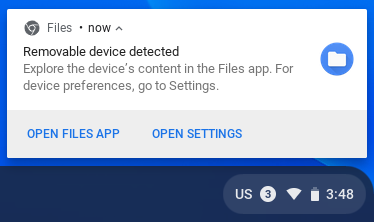
- Log into your Chromebook and plug in your USB stick.
- A notification will appear letting you know that the Chromebook has detected your USB stick. Click Open Files App on the notification itself, or navigate to the Files app via your Chromebook's App Launcher.
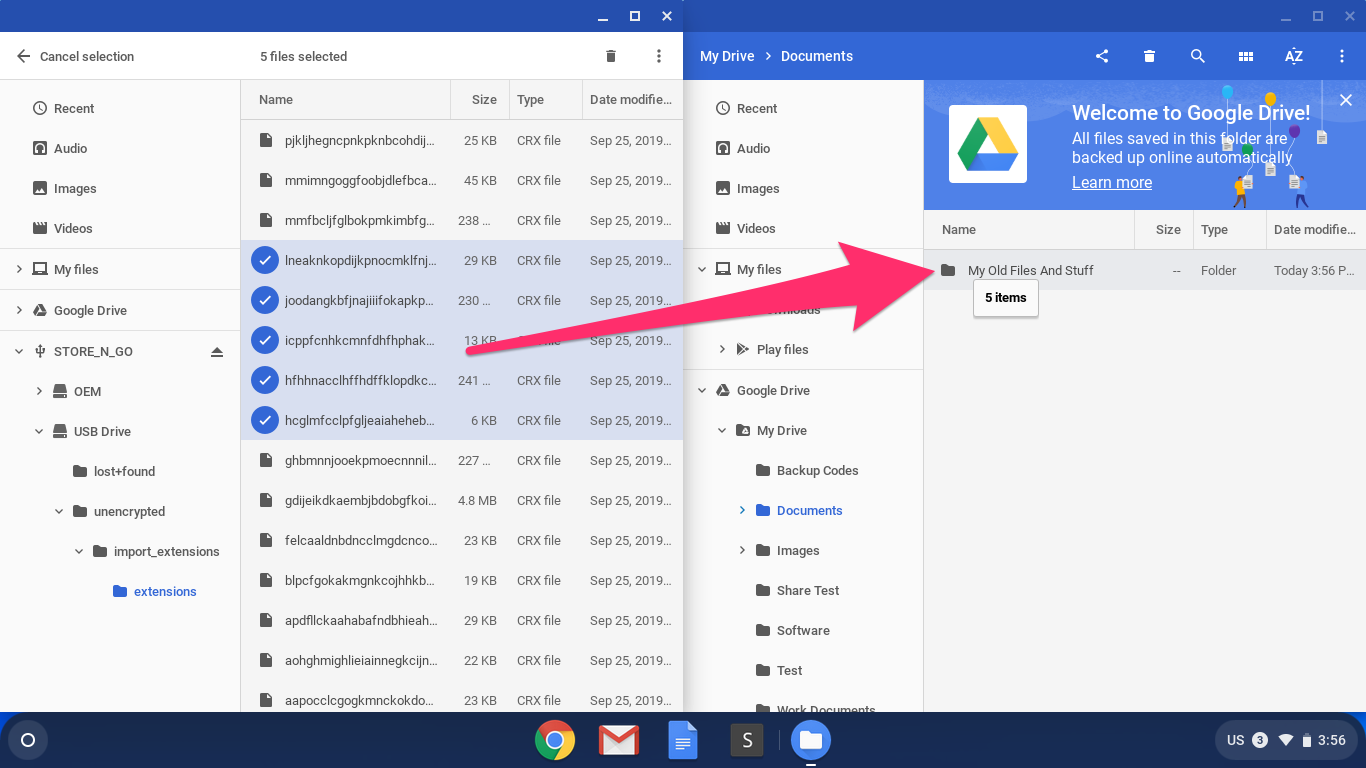
- In the Files app, you'll see your USB stick listed as an option in the left-hand column (its name could be almost anything, but you'll see a small USB icon to the left of its name, and an eject icon on the right). Click on it to see its contents.
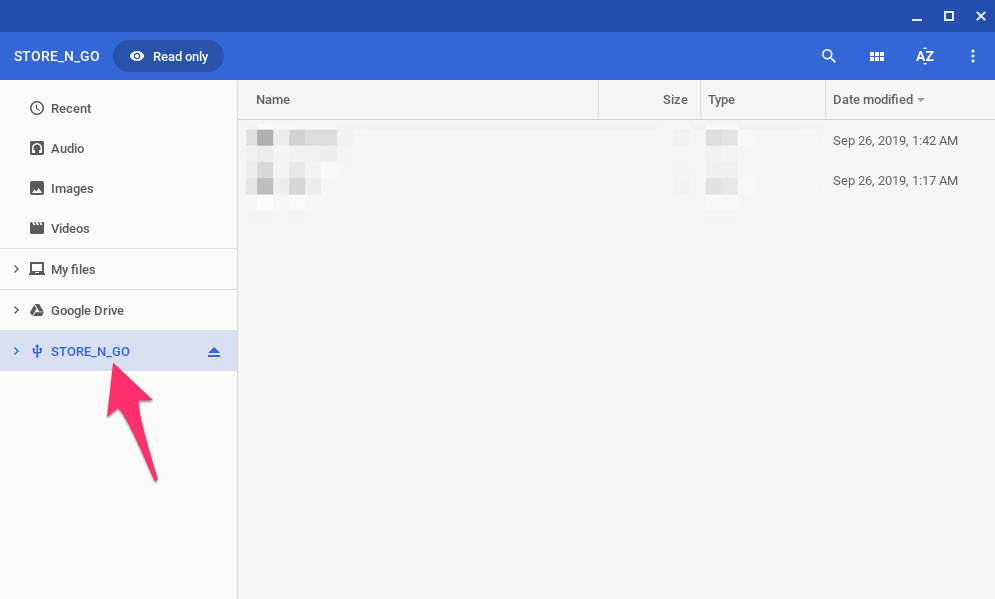
- Drag the desired files and folders from your USB stick to the Google Drive option in the left-hand column. Alternatively, you can open a second Files window by pressing CTRL+N. This will allow you have your USB stick and Google Drive open side-by-side, which should make it easier to drag content between them (pictured).
- You're done!


Note: Using this method, try to migrate small groups of files / folders at a time, and wait for them to finish before uploading more. If you have a lot of files, moving everything at once can sometimes cause issues with the upload!