Preparing for Remote Technical Support
Remote Support lets us help you when you need it, even if we're at another school or if you're outside of the classroom. Apps like TeamViewer QuickSupport and Chrome Remote Desktop let us connect to your device so we can see exactly what you're seeing. Don't worry, these apps randomly generate a single-use password each time so we can only ever connect with your help and permission.
How to Install
macOS
- You can download TeamViewer QuickSupport by clicking on this link: https://get.teamviewer.com/jjr7gza
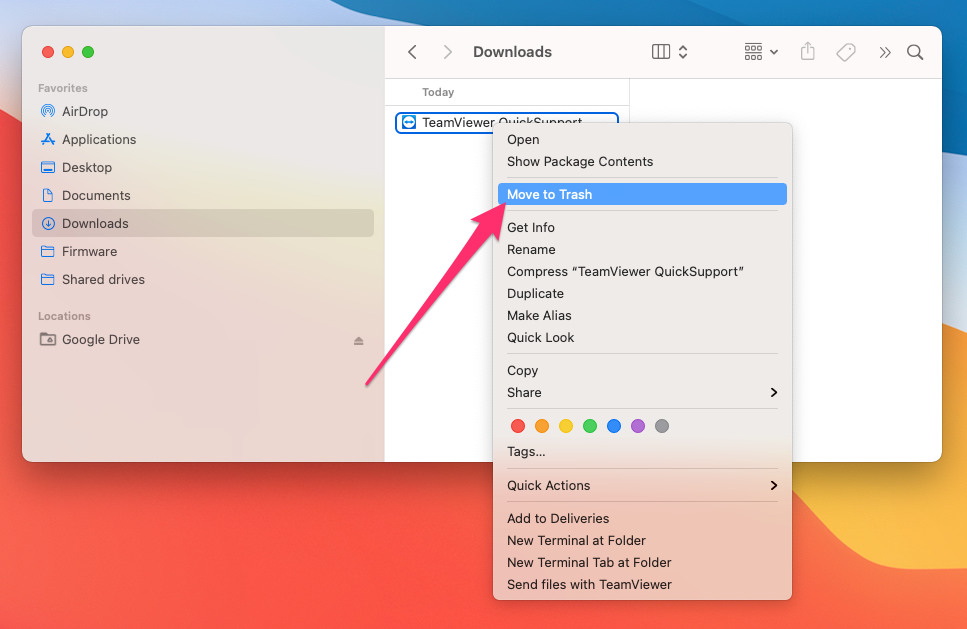
- Once the download finishes, locate the app within your Downloads folder
- Double-click the app to open it
- If this is the first time you've opened TeamViewer, you'll be asked to agree to the terms of service, and to Set up your Mac for TeamViewer.
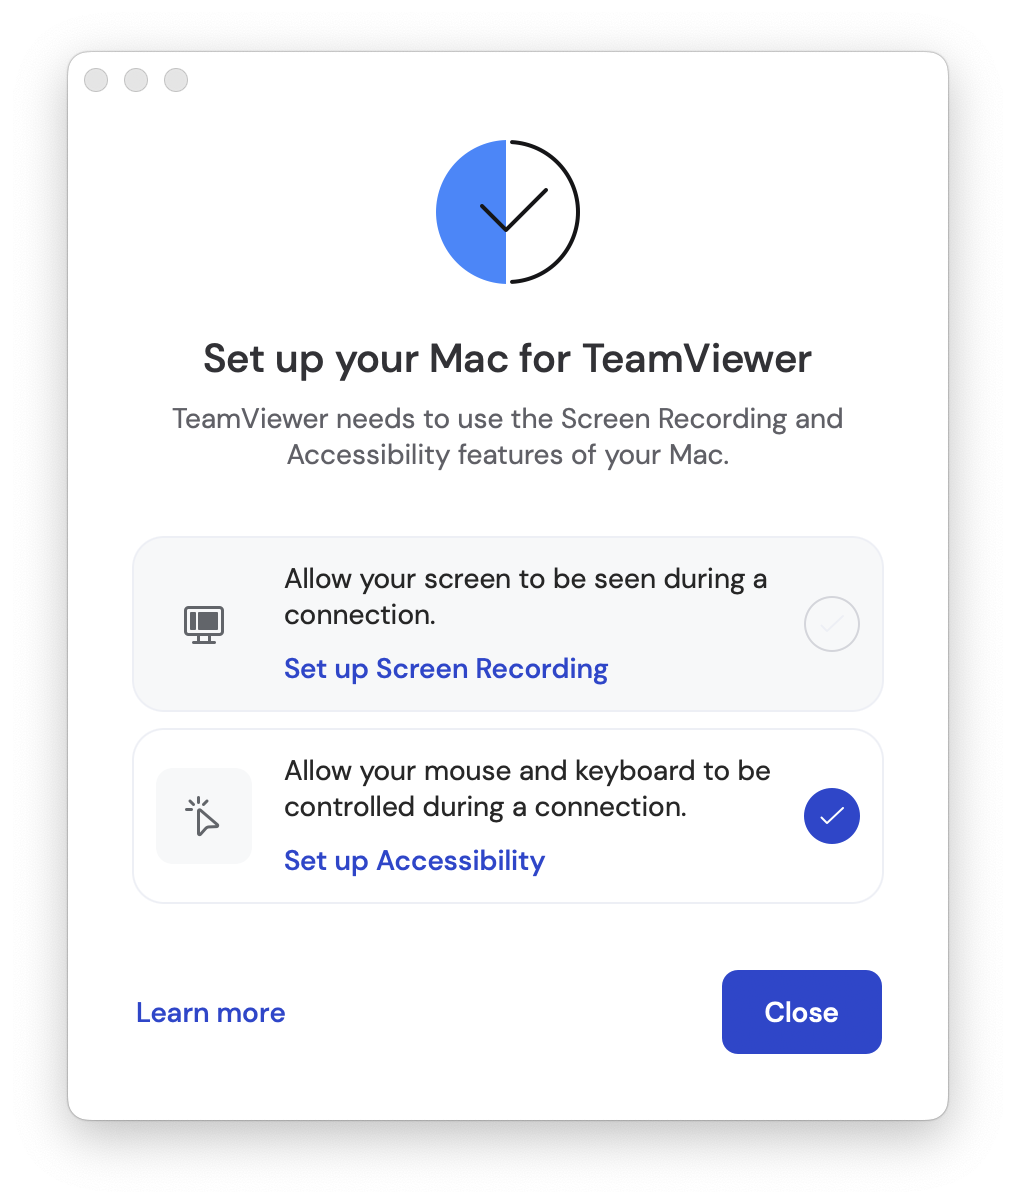
- If Screen Recording is not already checked, click Set up Screen Recording.
- A pop up will prompt you to Open System Settings. Note that this pop up can sometimes appear behind the Set up your Mac for TeamViewer window, so you may need to drag the intial window out of the way to see the pop up.
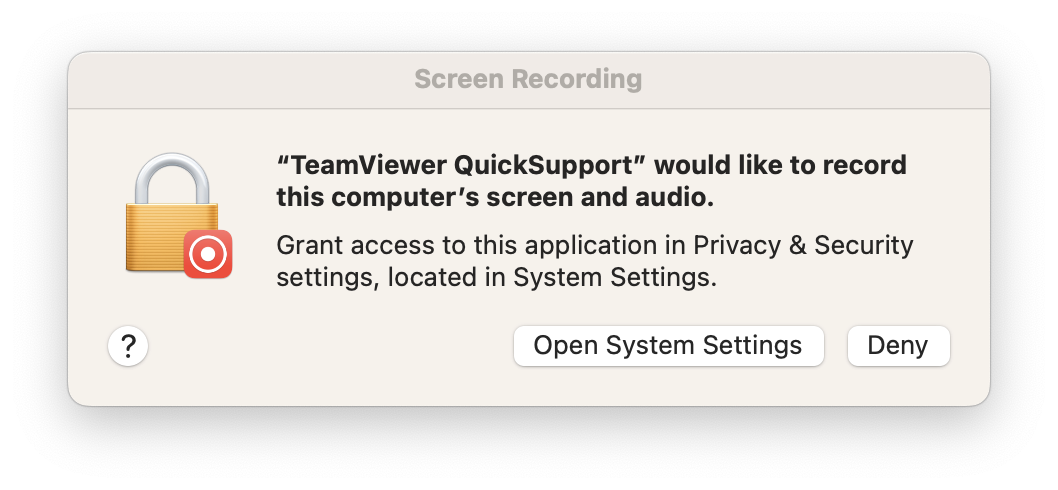
- Click Open System Settings
- Locate TeamViewer QuickSupport in the list and click (enable) the toggle. You'll then be prompted to enter your computer's login password.
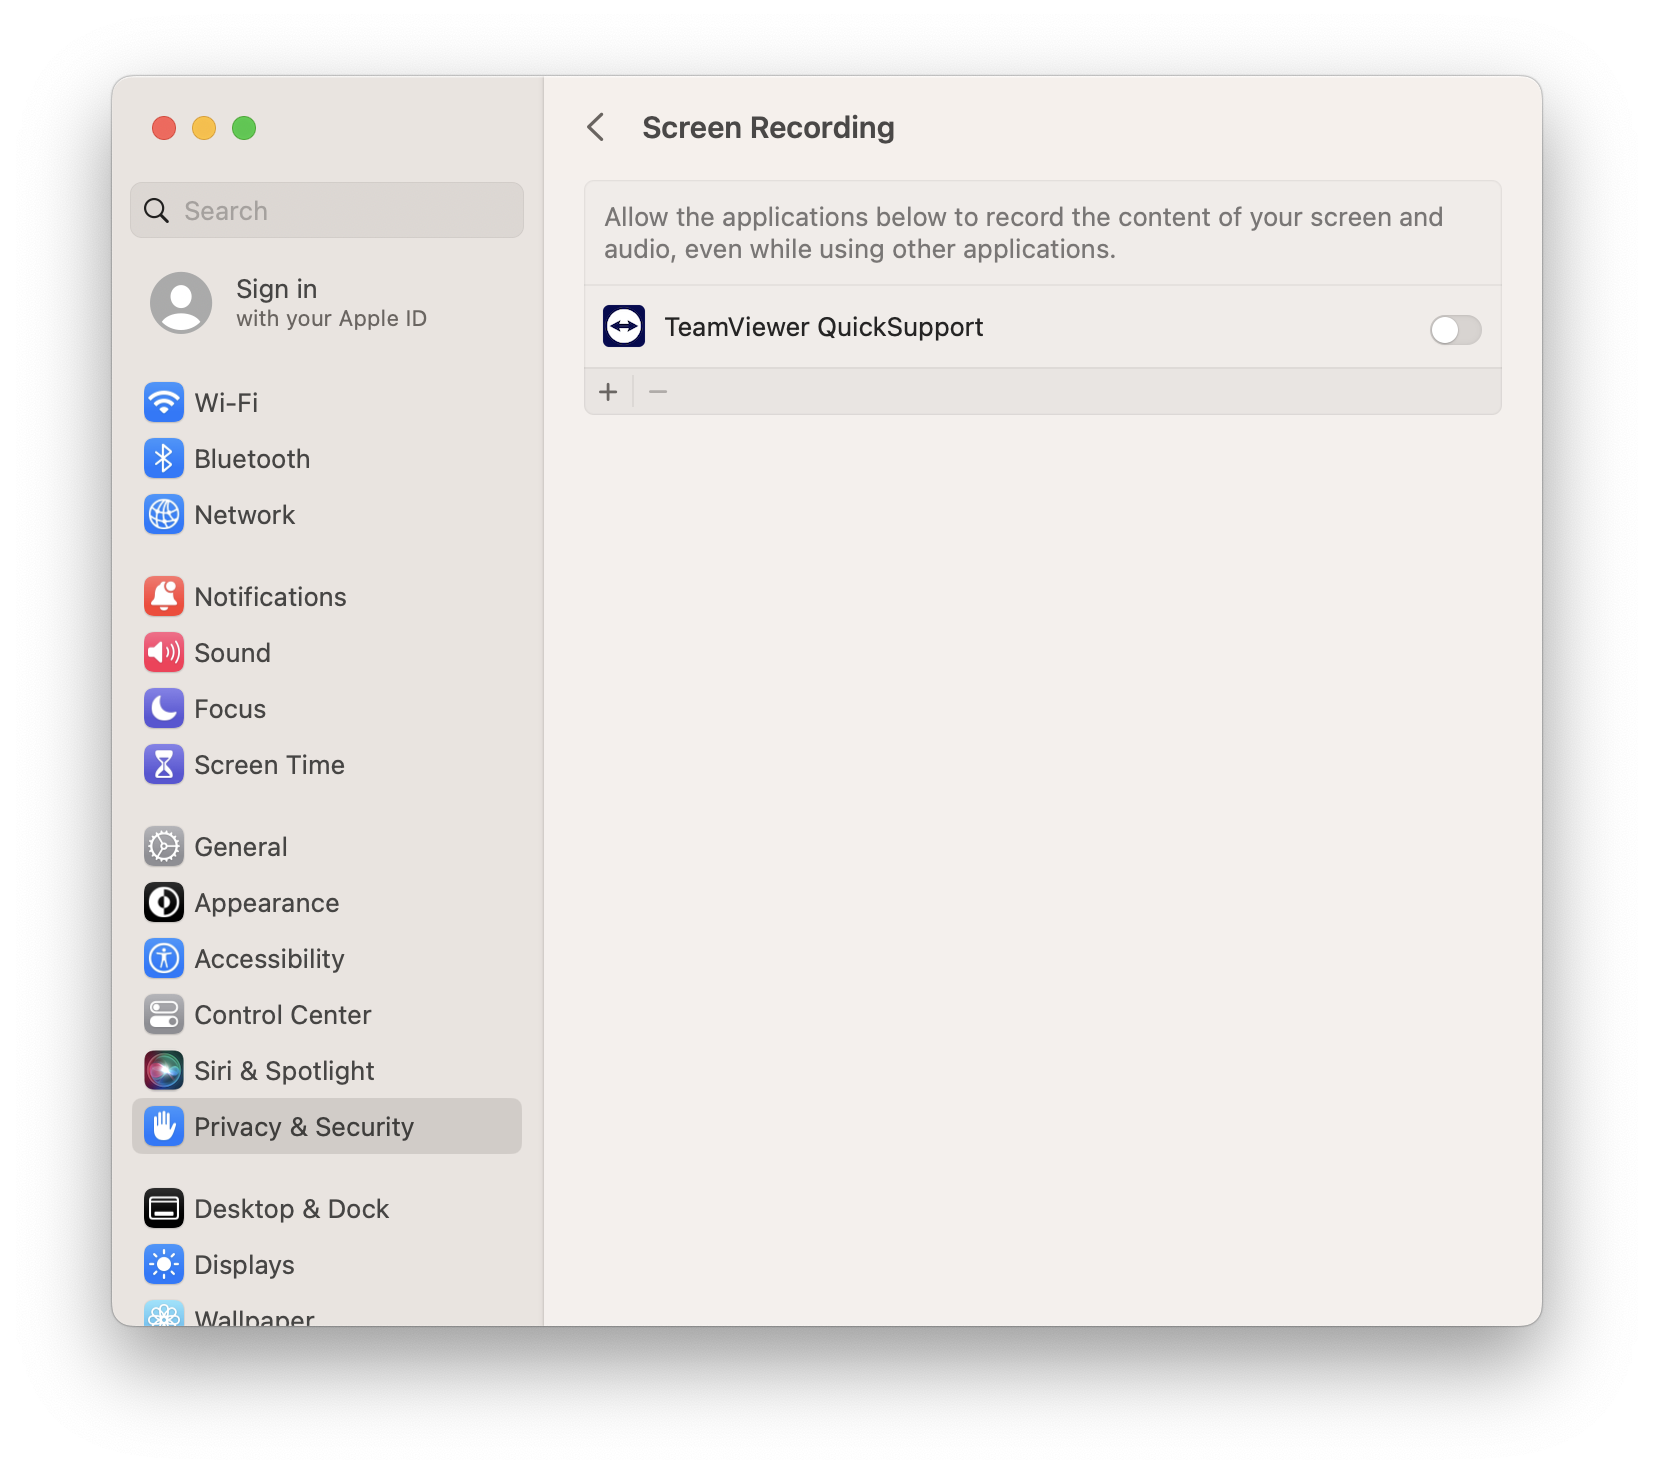
- Once enabled, you'll be prompted to quit TeamViewer in order for the new permissions to take effect. Click Quit Now.
- Open Finder, head back to your Downloads folder, and re-open the TeamViewer QuickSupport app.


iOS & iPadOS
- Open Self Service
- Search for TeamViewer
- Locate TeamViewer QuickSupport
- Tap Install
If you can't locate Self Service, you can follow the same steps within the App Store. Please note, the App Store may require an Apple ID and Password.
ChromeOS
We've already set up Chrome Remote Desktop on your school-managed Chromebook, so you won't need to install the app!
You can find and open Chrome Remote Desktop from your Chromebook's Start Menu / App Drawer.
How to use
macOS
Once TeamViewer QuickSupport has been given the appropriate permissions, the application will open a small window with two very important pieces of information:
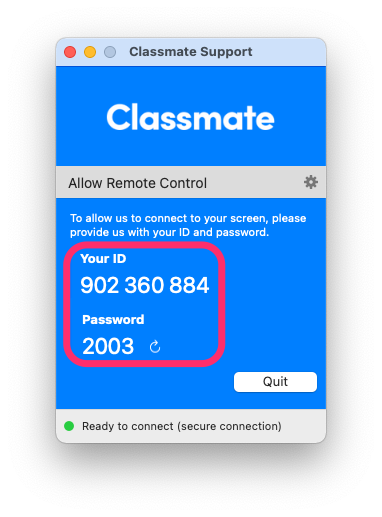
We'll need both Your ID and the Password to be able to connect to your device. Once you provide them, we'll be able to take control of your Mac and support you from wherever you're located!
TeamViewer QuickSupport will generate a new password each time it's opened, so for any follow-up sessions we'd need you to share the new password before we can connect to your device. That said, once we're done our session we'd recommend that you delete the TeamViewer QuickSupport app — the app is super easy to download and install, and deleting after each session will ensure that you always have the latest version of the application on your device when it's needed!
iOS & iPadOS
- On your device's Home Screen, find and tap on the icon labelled QuickSupport
- Once the app is open, you'll see a number labelled 'Your ID' — you'll need to share this number with us so that we can see your screen.

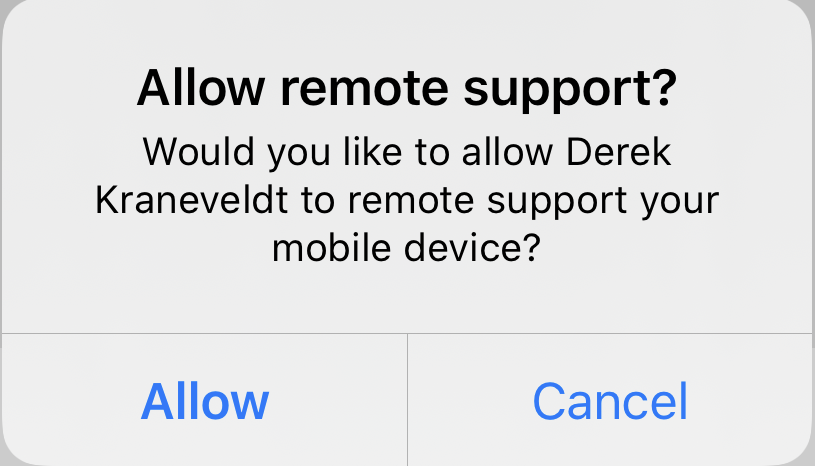
- Once you let us know your TeamViewer ID, we'll start the connection. You'll see a notification asking you to allow us to connect. Tap Allow.
- Next, you'll see a message that we've connected to your device, and a button that says Start Broadcast. Tap Start Broadcast, and then tap Start Broadcast again on the next page that appears.
- At this point we can see your screen and can help to guide you through your device. Note that unlike macOS devices, we can't control iOS and iPadOS devices directly — we can advise you on where to navigate and on what to do, but you'll need to be the one to actually do it.
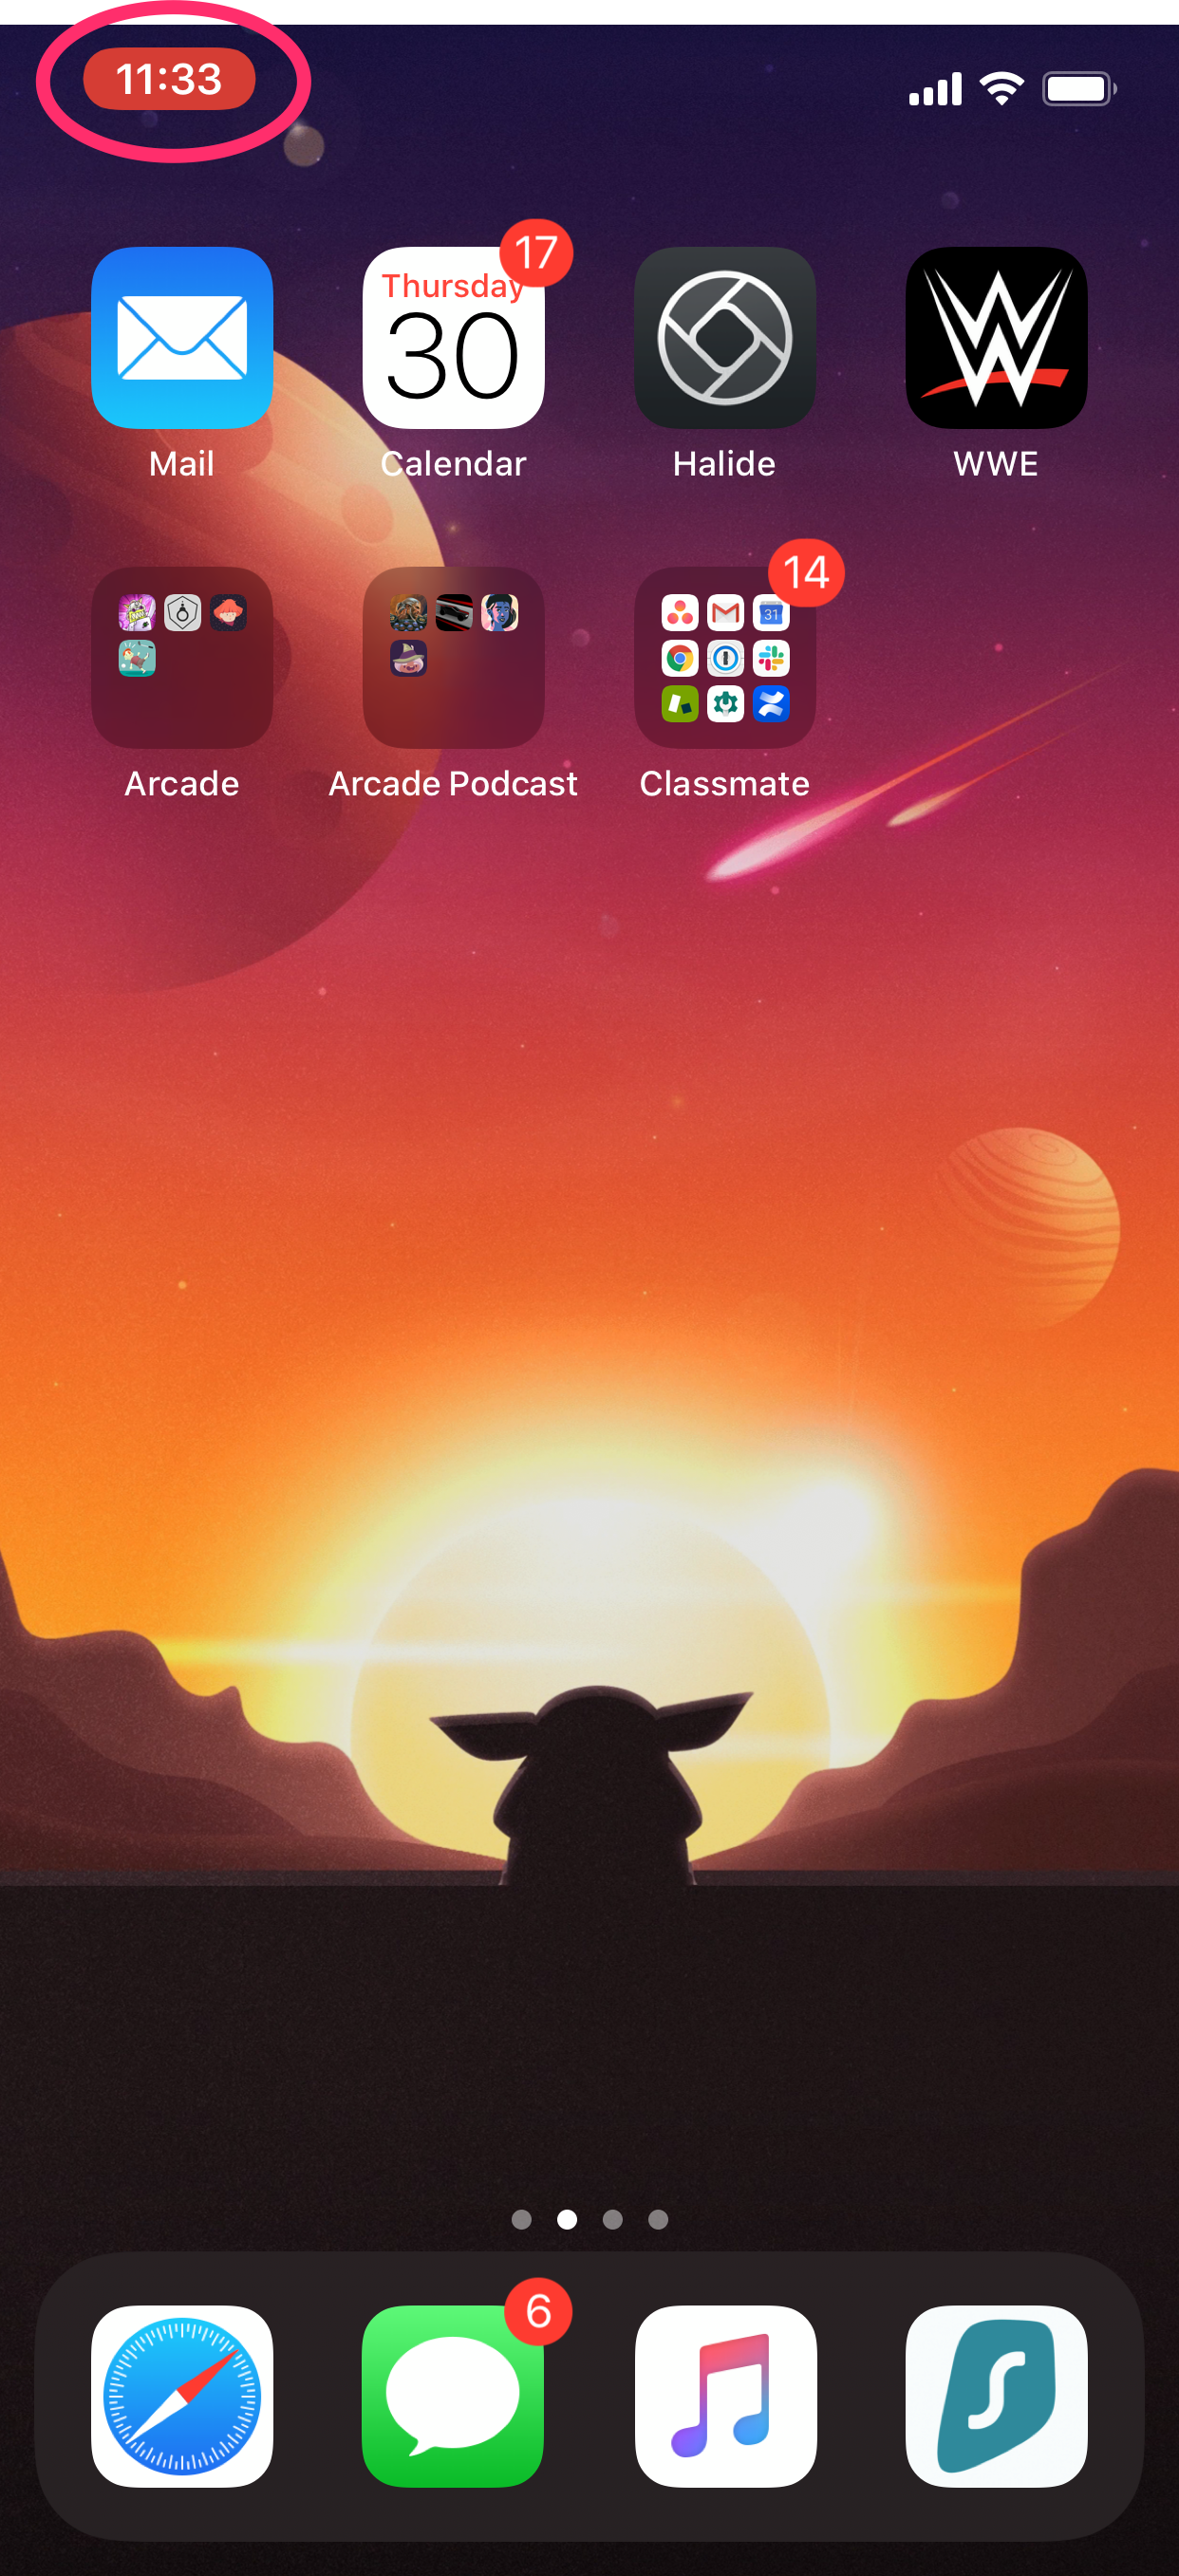
- Once we finish up, you'll want to ensure that you stop the broadcast. To do this, tap on the time in the upper status bar of your device. While broadcasting (or screen recording), this should have a red outline around it. Tap the red outline, and then tap Stop.


ChromeOS
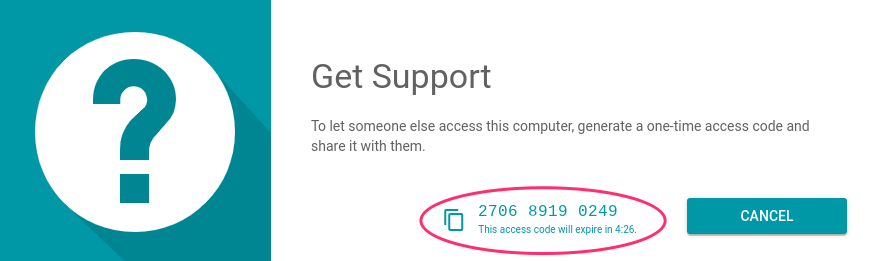
- Open the Chrome Remote Desktop app from the App Drawer on your Chromebook.
- Click on the Get Support tab at the top of the application, and then click Generate Code under the 'Get Support' header.
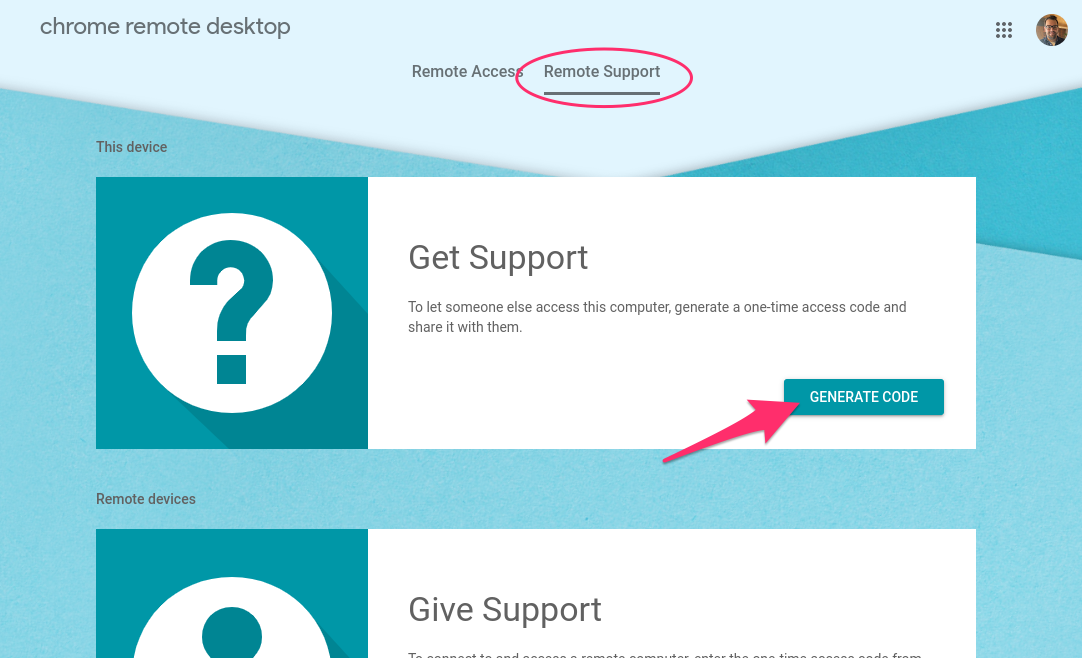
- A 12 digit support code will appear — you'll need to share this number with us so that we can take control of your device.
- Once we input the code on our end, you'll receive a prompt asking for permission for us to take control of your device. Click Share.

- You're done! We'll now be able to control your device and help you to resolve your issue.


