Changing the Audio Output on Your Chromebook
Between its built in speakers, headphone jack, and connection to your projector, you may run into situations where you'd like to change the location that your Chromebook is outputting sound.
Thankfully, you can do this in just a few clicks!
How to change your Chromebook's audio output:
Note: You'll only be able to change audio outputs if more than one audio output (eg. internal speakers, headphones) is available.
- Click on the time in your Chromebook's Status Tray (on the bottom-right of your screen) to show the settings in your Quick Access Toolbar.
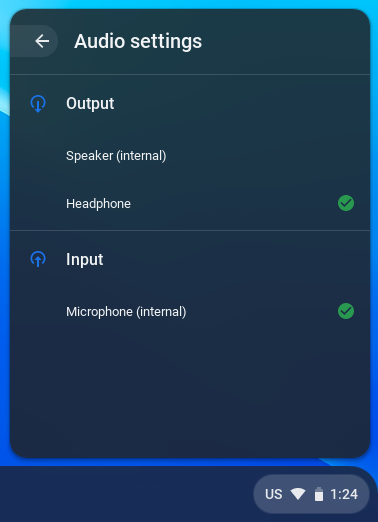
- Click on the Headphone icon to the right of the volume slider (this icon will only be visible if more than one audio output is available).

- Choose your desired output from the list. If you have speakers plugged into your Chromebook's headphone jack, these will likely be listed as 'Headphone'.
- You're done!


If you're not seeing the options that you're expecting, for example, speakers not showing up (remember that these will be listed as 'Headphone') even though they're plugged in, try unplugging them, plugging them back in, and checking for the desired option again.