How to Connect to Wi-Fi on a Chromebook
School-owned Chromebooks will automatically connect to your school's Wi-Fi network when located at your school.
In the instance that a Chromebook is to be sent home with a student or staff member for remote schooling, students, parents, and staff should know how to connect a Chromebook to their home Wi-Fi network. A user may not be able to log into a Chromebook until the device is connected to Wi-Fi.
Luckily, connecting to a new Wi-Fi network from a Chromebook takes just a few steps, even from the Chromebook's login screen:
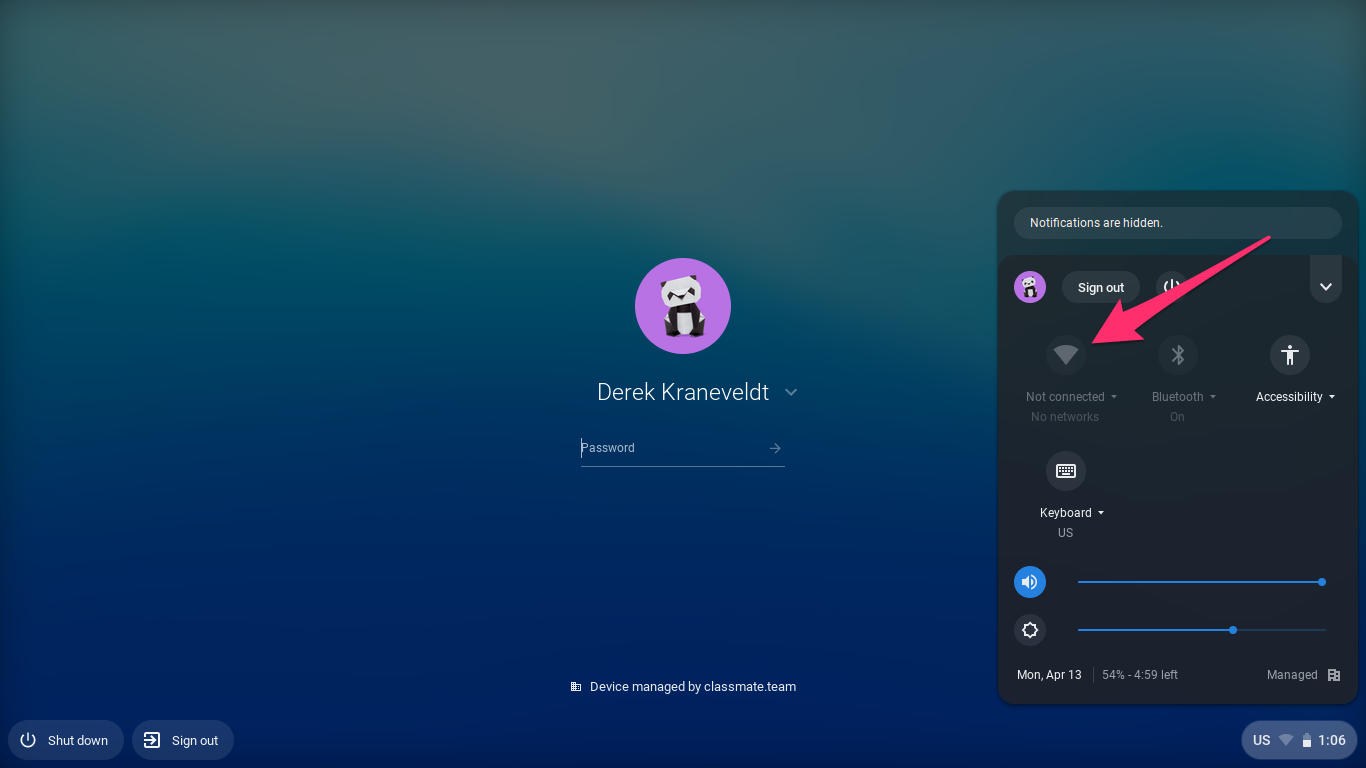
- Click on the Time area in the bottom-right corner of your Chromebook's login screen.
- In the settings menu that appears, click Not Connected (if your Chromebook is already connected to Wi-Fi, it'll show a network name here instead).
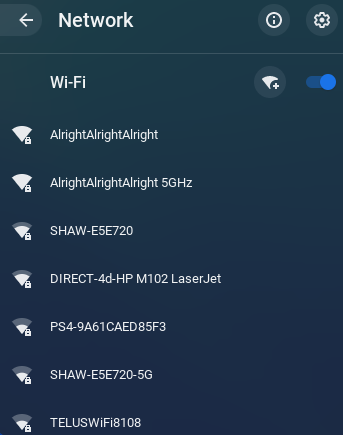
- You'll see a list of available networks. Click on the network that you'd like to connect to.
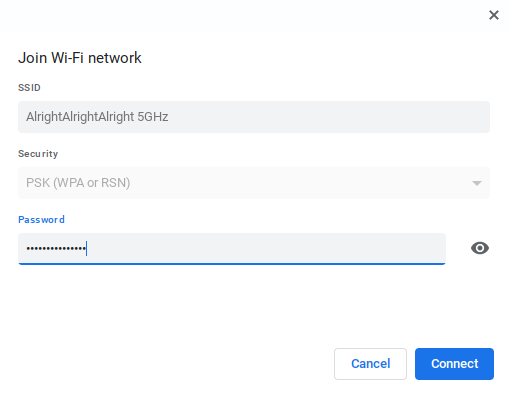
- Enter the password for the desired Wi-Fi network, and then click Connect.
- Once connected, you'll see the appropriate Wi-Fi network's name (as well as the strength of its Wi-Fi signal) listed when you click on the time in the bottom-right hand corner of your screen.
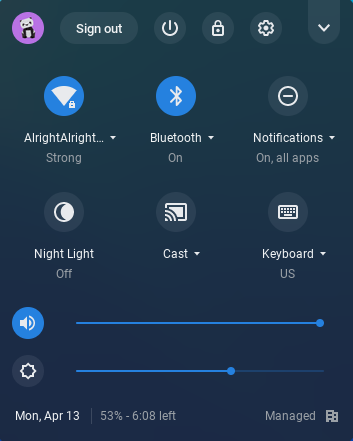
- You're done!


